
The demonstration video explaining how to make a moist, flavorful and succulent turkey is intended for people who are making their first holiday turkey, or who have not had the results they had wanted when they made their turkey.
As well, the video uses some of the other recipes I have made to complement a holiday meal, with the intention of providing a guideline on how to put together a perfect Keto Thanksgiving dinner, that people who do not follow a keto LCHF lifestyle will also find delicious and satisfying. As I mentioned, I have a lot of information I would like to share, and this post is to share those tips and explanations in order to help you understand the how-to do’s as well as why you should do the steps. I believe that knowing why you do a step or use an ingredient is important in truly learning how to cook. Cooking should not be just a mechanical process you go through without understanding the steps or ingredients.
Therefore, to make a great turkey my FIRST TIP would be that you buy a relatively small – (definitely under 5 kg / 11 pounds) and younger turkey. The meat will be much more tender. And do you really want a week of leftovers? So why buy a big turkey? Buy one to meet the needs of the particular event and the number of guests you are feeding, with perhaps just a serving or two of leftovers.
TIP TWO – buy a fresh, not frozen or previously frozen turkey. Fresh is always better in all types of foods. Quality over quantity, especially for special occasions such as Thanksgiving or Christmas dinners.
TIP THREE – do not buy a pre-stuffed or pre-basted turkey: this is most definitely a no-no because the stuffing will most likely not be KETO (it have some form of bread or grain or rice in it) and these ingredients are not good for you. Pre-basted turkeys are usually basted with oils to make the meat less dry. First, the oil may be a vegetable oil such as corn oil, and that’s not a good thing. Also, a good quality young turkey, roasted as I describe, will give you a much better and more natural result without having the meat artificially injected with oils. Besides, making a turkey dinner from scratch is very easy and the results are so much better! Whenever I can, almost all of the time, I buy a fresh turkey for my Thanksgiving or Christmas dinner.
PREPARING THE TURKEY
Step 1:
- Begin by removing the plastic wrapping and untucking the legs from the flap of skin holding them in place- do not cut this flap, you will need it to reposition the legs later
- Then remove the neck and giblets bag from the cavity and also check the neck area cavity – sometimes the giblets are put there
- cut any extra fat just hanging at the opening of the torso,
- set the neck, giblets and fat aside as you don’t need them right now
- Check for, and remove any plastic left on the turkey
- Drain the liquid from the cavity into the sink and rinse off both the cavity and surface
- Make sure you later clean your sink well-you do not want to contaminate the sink or allow salmonella to grow
- Then pat dry the outside skin of the turkey with paper towels. Throw these used towels into the bin right away. You do not want to contaminate your work surface. When working with poultry, it is important not to cross-contaminate ingredients or your work surface where you will be preparing the rest of your meal.
- If you have just taken the meat out of the refrigerator, let the turkey meat get to room temperature before seasoning. That should take about one hour. The reason for letting the entire turkey get to room temperature is that you will have much more even cooking time for both the internal and external meat. If the turkey is chilled, the exterior will heat up faster and look cooked well before the internal meat is done. This will result in tougher, overdone dry exterior meat and possibly still raw or underdone internal meat. And this contributes to the dry meat effect.
- TIP FOUR to make it easier to lift the turkey out of the pan, so that the legs or wings don’t fall off when it is done, pre-line the pan with a wide double row of aluminum foil. Make sure your length of aluminum foil is long enough to cover the bottom, sides and have enough to create a handle on both sides of the pan as well. I have found that the string that is sometimes provide to help you lift the turkey is kind of useless. My perfect looking turkey gets damaged as I try to lift it out of the pot with the string. This aluminum foil is nice and wide and cradles the turkey as you move it.
- Do not forget to put the tray to the bottom third position in your oven and then preheat the oven to 188 C or 370 F
- Put a cookie sheet underneath the tray to catch any drippings that could otherwise cause an oven fire
TO STUFF OR NOT TO STUFF? – THAT IS THE QUESTION
Step 2:
At this point you can choose either to stuff your turkey or not do a stuffing. The important thing to remember, for people watching their carb counts, is that most stuffings will add a few carbs to your total dinner. If you like stuffing, just factor that into your portions of stuffing, vegetables and dessert for your entire meal. I choose to save as many carbs for the dessert, but how you determine your carb selection is up to you.
The important thing about the interior of the turkey, whether you are or are not using a stuffing, is that whatever you put into the cavity will both season and baste the turkey from the inside. This is one of the secrets to a perfect moist turkey
The Stuffing:
In the video, I made a simple chicken sausage stuffing. Here are the ingredients
- 2 chicken sausages – remove meat from casing and place into a bowl and fry until medium done
- 2 celery stocks – chopped into small pieces
- 1 cup cilantro – chopped
- 1 cup unsalted butter – room temperature
- 1 tbsp poultry seasoning
- 1 tsp thyme powder
- 1 tbsp salt
- 1 tsp black pepper
Combine all the ingredients making sure the butter is well distributed. Place stuffing into the turkey’s cavity.
No stuffing:
If you are not stuffing your turkey, then make a basting with this seasoned butter:
In a small bowl, combine and stir
- 1/2 cup of room temperature butter,
- 2 tbsp of olive or avocado oil,
- 1 tbsp of poultry seasoning
- 1 tsp of garlic powder
- 1 tsp of thyme powder
- 1 tbsp salt
- Stir all the ingredients well and with your hand do your best to coat the entire cavity with this seasoned butter.
- You could also put that flap of fat you cut away onto the bottom of the cavity- this will help flavor the turkey meat and the fat will keep the meat moist.
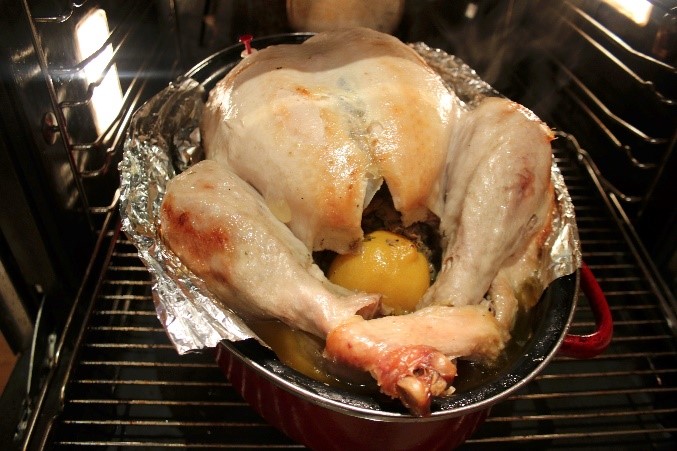
- Then I recommend you take a large lemon and stuff it into the opening before you tuck the legs back into the flap of skin to hold the legs in place. The lemon will give the meat a really nice extra bit of flavor and you can use the roast lemon to make a lemony sauce later or squeeze out the lemon pulp and put it as a topping instead of cranberry sauce. It actually goes really well with a savory turkey.
THE LITTLE RED BUTTON
You will notice there is a little red button on the turkey in my video. if you can get a turkey with this kind of indicator, that is a good idea because this button will pop up when the internal temperature is right, and your turkey is done. This is a good think to look for on a fresh turkey. However, if your turkey does not have this, no worries.
BASTING THE EXTERIOR OF THE TURKEY
Step 3:
Get a small bowl or cup and into it, place:
- half cup of room temperature butter
- 1 tbsp of salt
- 1 tsp of garlic powder and 2 tbsp of either olive or avocado oil
- Stir well to form a paste. Then simply rub this paste all over the top and sides of the turkey, making sure you also coat the area between the leg and the sides. Be liberal with this paste!
ROASTING
Step 4:
- Next cover the turkey with aluminum foil leaving a bit of a gap so that the aluminum foil is not touching the breast of the turkey
- Place the turkey into the preheated oven and roast for about 30 minutes per kilogram weight of the turkey, or per every 2.2 pounds of the turkey
- This is just a guideline, so you do have to check on your turkey from time to time
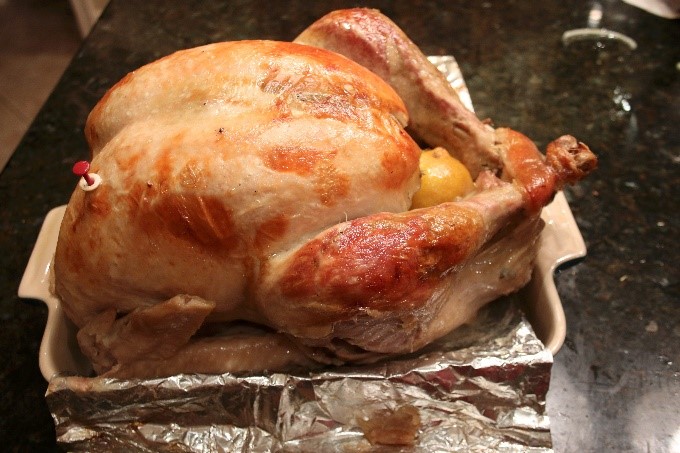
- At about 30 or 45 minutes before you anticipate that your turkey will be done, take the turkey out of the oven, remove the aluminum foil, and use some of the drippings to baste the entire surface of the turkey.
- After basting, place the pan with the uncovered turkey back into the oven. I suggest you re-set a timer so you do not forget how much time is left.
- Roasting the uncovered turkey will allow the skin to get a nice golden brown and also to get crispy, but do keep an eye on the turkey so it does not burn. If your turkey is not browning evenly, rotate it 180 degrees to allow the other side also to brown.
- To check if the turkey is done the old-fashioned way, poke either the thick part of the thigh or breast with a sharp knife or thin metal skewer. If the juice coming out is completely clear, the turkey is done. Also use your nose, it should smell like done meat.
IMPORTANT TO LET THE TURKEY REST BEFORE CARVING THE MEAT
Step 5:
Now the last tip to ensure your turkey is moist and not dry:
TIP 5 drain about 2/3 of the drippings from the pot – you will use this to make gravy.
- Leave the rest of the fluid in the roasting pot with the turkey. Take the aluminum you had for the covering, make a tent, and loosely place it on top of the turkey. Then allow the meat to rest. The wisdom I was told was to let the turkey rest 1 hour for every hour you roasted it or for a minimum of 3 hours. It’s ok if the meat is cool because it will be so much more flavorful, because the juices will go back into the deep parts of the meat and your turkey will be incredibly moist and succulent – not the typical dry string turkey that would result if you do not let it rest long enough. Also, you will be serving the meat with hot gravy.
THE GRAVY
Step 6:
- Pour the drippings into a deep-sided pot. In a half a cup of water, add 1 teaspoon of glucomannan powder and stir right away so that the glucomannan does not clump. Pour this mixture into your drippings as you are whisking the drippings – this also prevents lumps from forming. Taste for salt, adding a bit at a time as you re-taste. You may also want to add a bit of black pepper. Cook for about 5 – 8 minutes over medium low heat. If you do have small lumps, just pass the gravy through a strainer before pouring into a gravy boat.
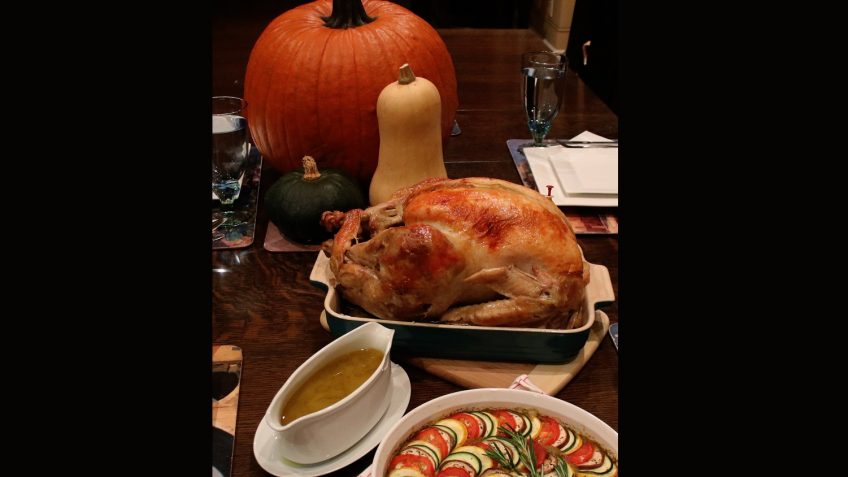
THE SUGGESTED MENU
To complete the Keto Thanksgiving menu I would like to suggest you serve
- Ratatouille (Pixar style) as your vegetable side
dish. This is so easy to make and looks incredibly
impressive.

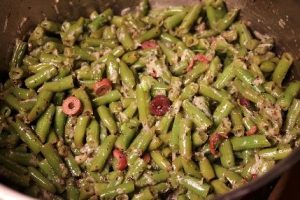
- An alternative, or as a second side dish, you could
also serve the Parmesan and Herb Green Beans.
These sides will be appreciated by people on the
keto diet as well as people who do not follow a
keto diet.
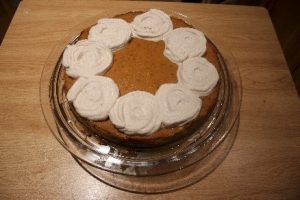
- For dessert, I like the seasonal favorites such as
either of these two pumpkin desserts: the
amazing pumpkin pie with cinnamon cream
or the very easy spicy pumpkin and hazelnut cream
custard.

- Or, if you want something other than pumpkin, the Lemony Panna Cotta is a great light alternative.

Enjoy!
You must be logged in to post a comment